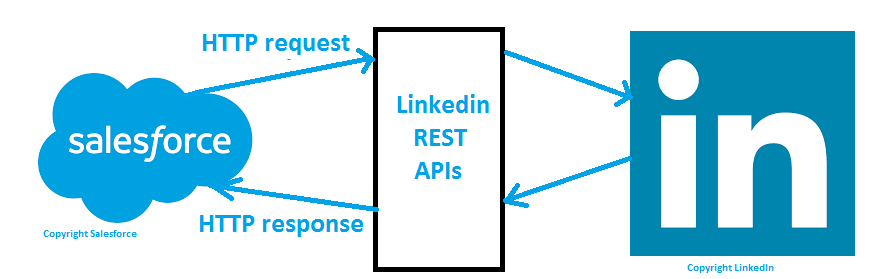
Cloud computing has opened the doors for infinite possibilities and in one such attempt this blog presents a tutorial for integration of the world’s best cloud based CRM i.e., Salesforce with the world’s top professional networking website. Integration has been performed by accessing LinkedIn APIs from Salesforce. This post will be really useful for beginners in the Salesforce development domain who desire to quickly familiarize themselves with the basics of integration process. After going through this blog the reader will be able to implement the integration process himself and perform several variations further based on his level of expertise on Apex, Visualforce and intricacies of Salesforce CRM. However, it is noteworthy that merely reading the blog may not serve the purpose entirely and actual implementation will help a great deal in cracking the mystery of integration process.
The USP of this tutorial lies in the fact that unlike many other integration flows available on the internet, a step-by-step execution of this tutorial invariably produces the expected output in your Salesforce org which provides a strong foundation for self experimentation and learning. Moreover, support will be provided by author of the blog in order to eliminate any hindrances in complete execution of the flow. The author has a strong belief that there is always scope for improvement and therefore constructive comments and suggestions are invited form the readers.
The entire flow of integration comprises of nine steps. The integration flow will demonstrate how to fetch basic LinkedIn profile information such as first name, last name, profile headline and profile URL in different fields of a record belonging to a custom object in your Salesforce org through LinkedIn REST API.
Step 1: Generate access token by creating a LinkedIn app
This is needed because LinkedIn relies on the industry standard OAuth 2.0 protocol for granting access.
There are three sub steps for generating an access token.
(For more details visit: https://developer.linkedin.com/docs/oauth2)
(a) Configuring your LinkedIn application
Go to: https://www.linkedin.com/developer/apps
When prompted fill in your linkedin signin credentials
Click Myapps
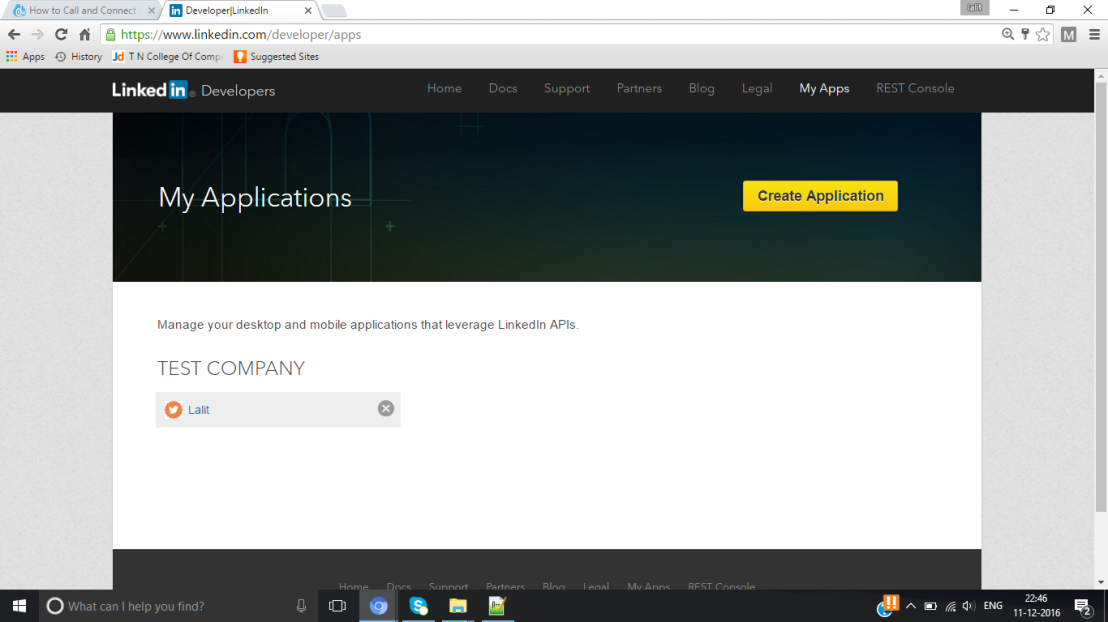
Click on Create Application. Fill up the entries and click update. As an immediate result, you will notice Client ID and Client Secret. (A word of caution! At the risk of your own application’s security, DO NOT share your Client Secret value with anyone! This includes posting it in support forums for help with your application).
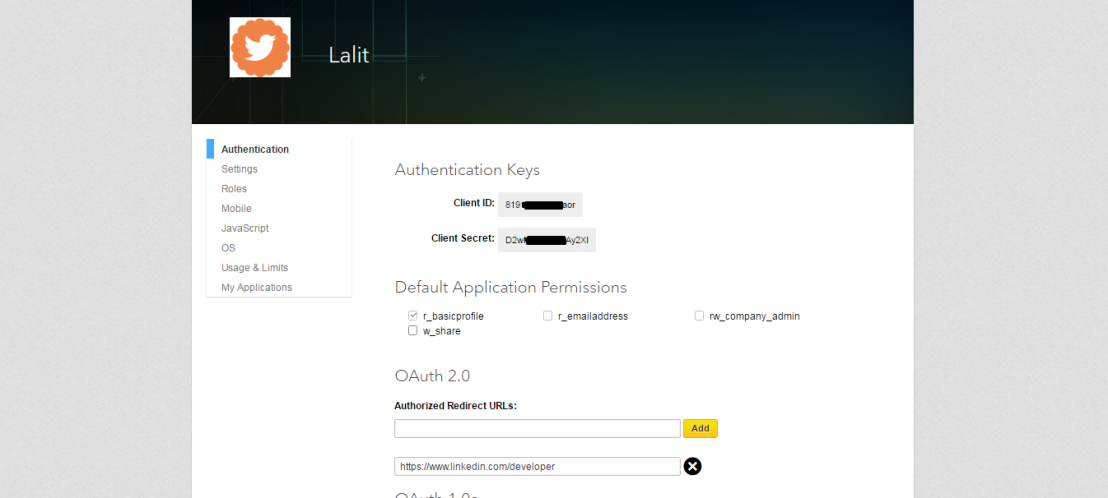
In the OAuth 2.0 section fill https://www.linkedin.com/developer as the Redirect URL and press Add button. Click update.
(b) Request an Authorization Code
Have a look at the following URL.
There are different arguments in the URL such as response_type, client_id, redirect_uri, state and scope separated by ‘&’.
In this URL only client_id and redirect_uri need to be replaced.
Pick and replace the client_id value as shown in the previous screenshot and generated in your own app.
Insert redirect_uri after URL encoding, actual redirect_uri can be referred from the app. In my app I have used “https://www.linkedin.com/developer”; as the redirect_uri. After URL encoding the redirect_uri field becomes
“https%3A%2F%2Fwww.linkedin.com%2Fdeveloper”
URL encoding is the practice of translating unprintable characters or characters with special meaning within URLs to a representation that is unambiguous and universally accepted by web browsers and servers. Use the following link for URL encoding
After entering client_id and redirect_uri values in the URL, paste it in your browser.
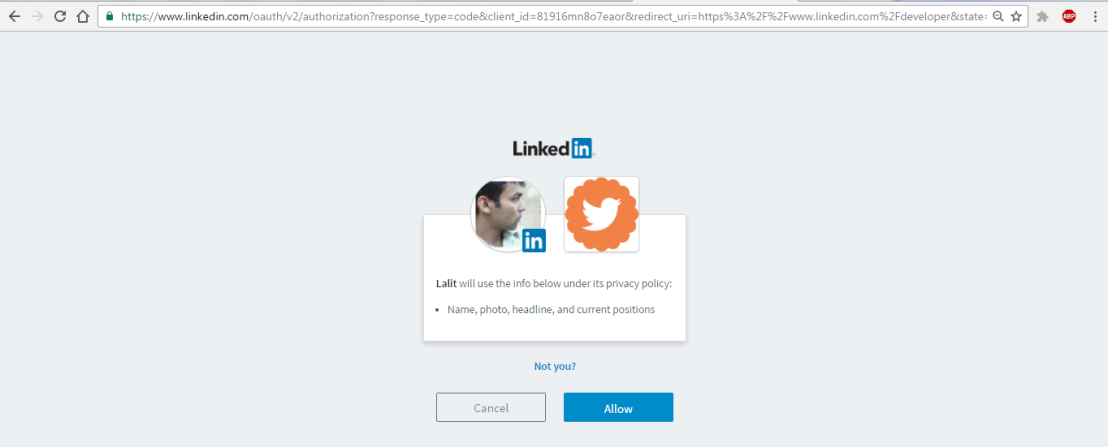
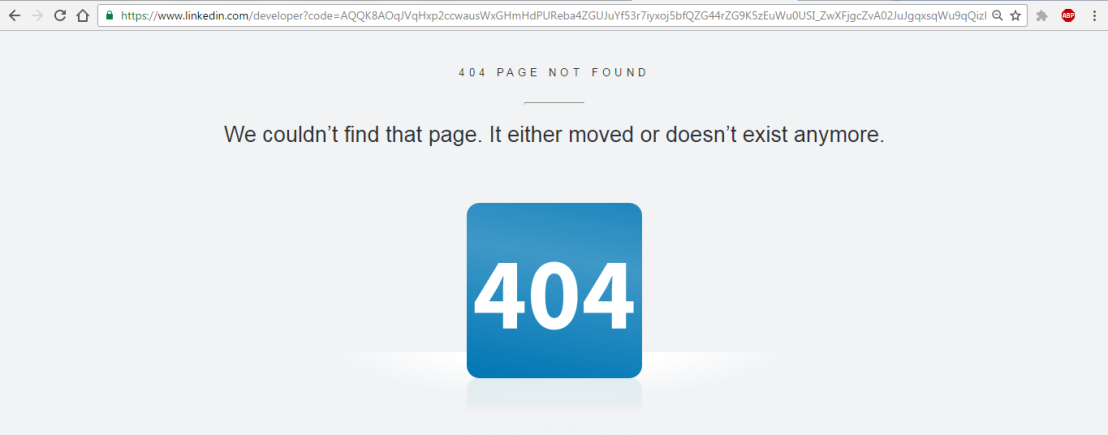
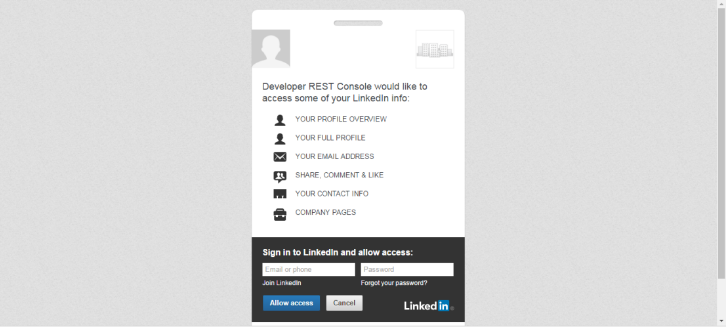
Once redirected, the user will be presented with LinkedIn’s authentication dialog box. Click Allow and as a result two arguments will be returned, “code” and “state” in the URL in the address bar out of which, the value returned in the argument code is the desired authorization code to be used in the next step.
(c) Exchange Authorization Code for an Access Token
Paste this URL in your browser by first replacing the code (as returned in the URL in the previous screenshot) (A word of caution! Don’t copy the value of code argument in haste as state argument value might also be copied resulting in error). Client_id and client_secret argument need to be assigned values with the values generated in your app.
When this URL is pasted in the browser an access token is generated with expiry information as shown below:
{“access_token”:”AQW-cW34GE0Is2oZgMveYJs3bW22zMpM2GjF2ErCugYNxPVSdOfzENgfSTifVflw1Nm-VXVMiEugwsIhV93pQ3-6NbPshbjWxtrtFmcP1u6r60lZ4rQsM37tRJ-a5-OTbzJq_MB17NIY”,”expires_in”:5184000}
This access token is valid for 60 days.
(Please note that values for various arguments like client_id, access_token etc. used in some previous steps must be generated through your own and using them as it is from this post will not solve the purpose because they have been modified for security purposes).
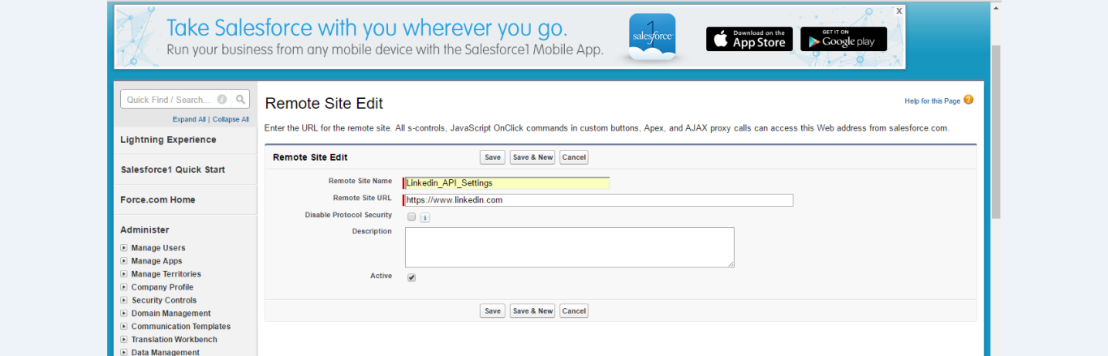
Step 2: Remote site settings
- To call APIs of external platforms using Salesforce Remote site settings are performed.
Setup → Quick Find / Search → Security Controls → Remote Site Settings → New
- Remote Site Name: LinkedIn_API_Settings
- Remote Site URL: https://api.linkedin.com and make it active.
Step 3: Calling API method in Rest Console to retrieve the basic profile information
Go to LinkedIn Developer Network (https://developer.linkedin.com/)
Click on Rest Console at the top right corner.
You will be routed here.
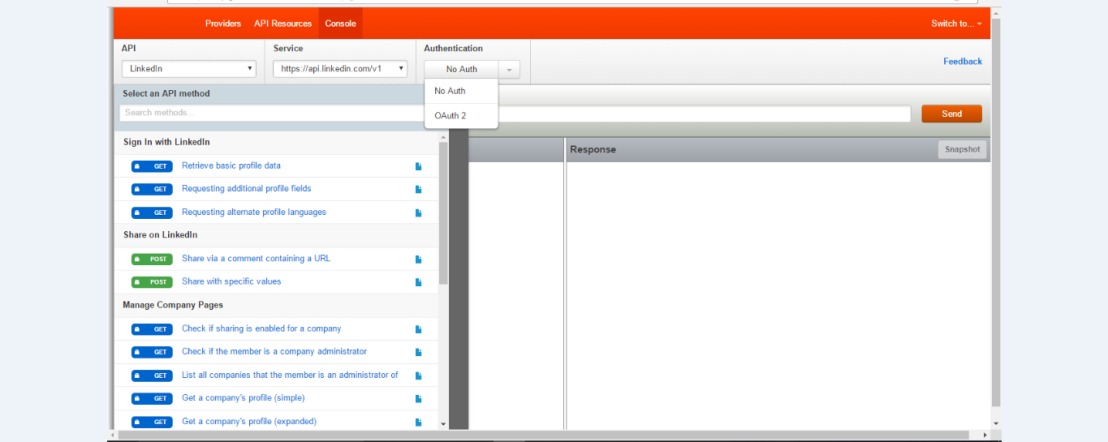
Click on OAuth 2.0 in the authentication section in order to authenticate the LinkedIn account with this Console App.
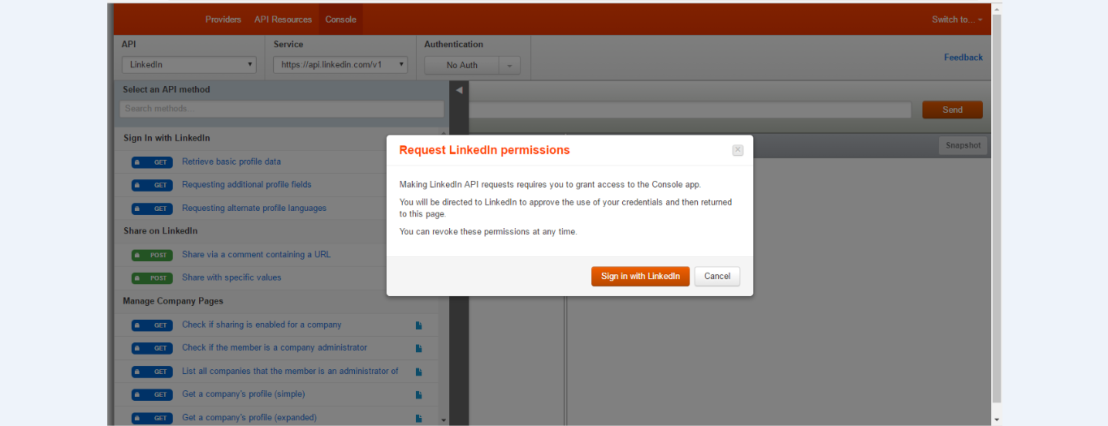
When prompted, Sign in with the LinkedIn Credentials as shown below:
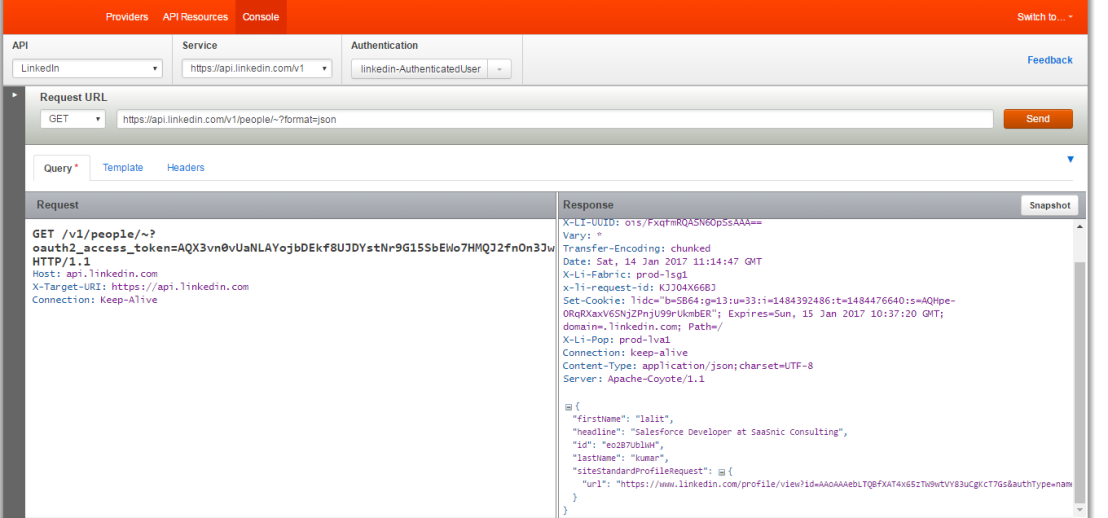
Now click the left arrow (shown on top left with small size and white colour in the screenshot below) to select an API method in Console app. Here, you click on “Retrieve basic profile data” under “Sign In with LinkedIn” heading. Append format=json at the end of request URL otherwise the response will be returned in XML format. Hit send button to get HTTP response in JSON format. All the information (example, “firstName” : “lalit”) which is present in this API is retrieved.
Step 4: Create Salesforce Custom Object and Fields
Next, some custom objects and fields need to be created in Salesforce org. This is done for mapping the information contained in the JSON response to the respective fields.
Follow the below mentioned steps:
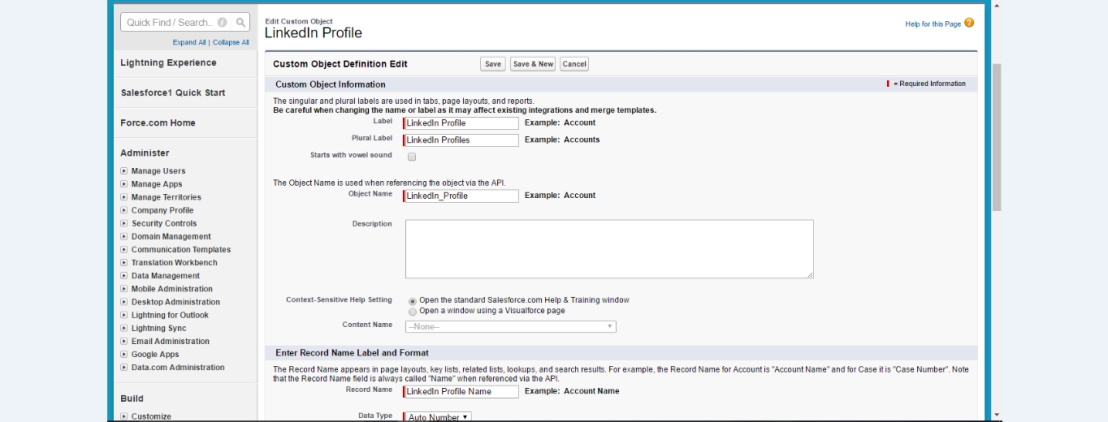
- Click Setup → Quick Find / Search → Create → Objects → New Custom Object
- Name the Label as “LinkedIn Profile”.
- Fill “LinkedIn Profile Name” in Record Name option.
Access LinkedIn Profile object to add some custom fields. These fields will be associated /mapped with the values obtained in the LinkedIn HTTP response which is retrieved in JSON format. The list and type of fields to be added is as follows:
- First Name (Text type)
- Last Name (Text type)
- Headline (Text Area)
- Profile URL (URL)
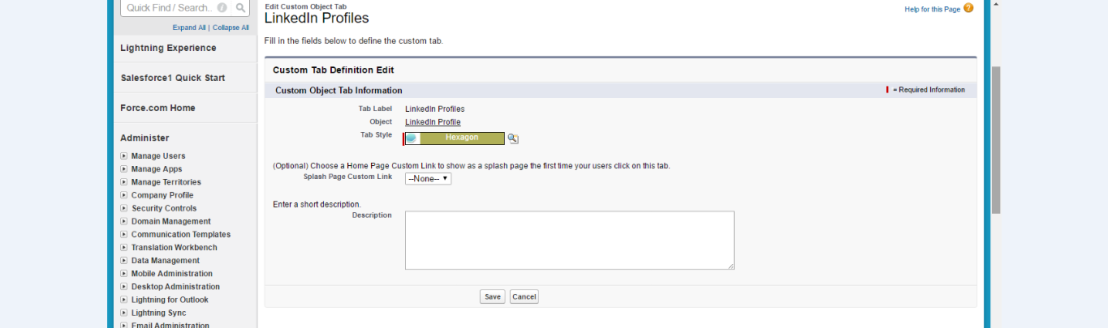
Step 5: Next step is to create a Custom Tab for this Custom Object
- Click Setup → Quick Find / Search → Create → Tabs → Custom Tabs → New
- In the Object Picklist, select the object that you have created and the tab style.
- Save the tab.
Step 6: Creation of Custom Settings
To access and retrieve information from LinkedIn APIs using Salesforce, custom settings need to be performed.
Navigate to Setup → Quick Find / Search → Develop → Custom Setting → New
- Put “LinkedIn API Setting” as label.
- Select “List” in Setting Type picklist.
- Select “Public” in Visibility picklist.
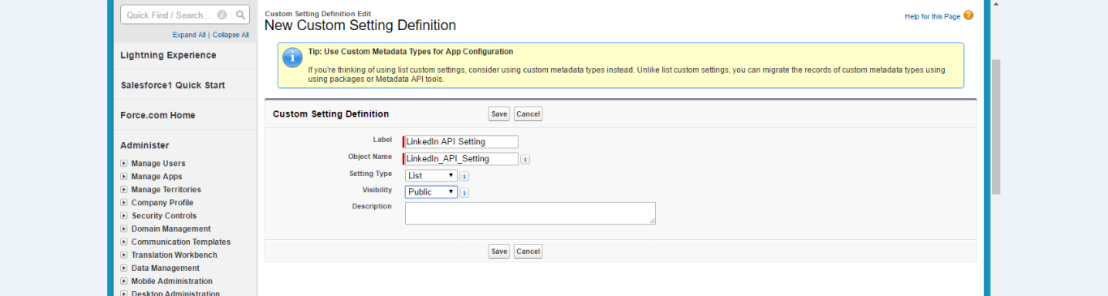
Create custom field (Text Area type) as “Value” .
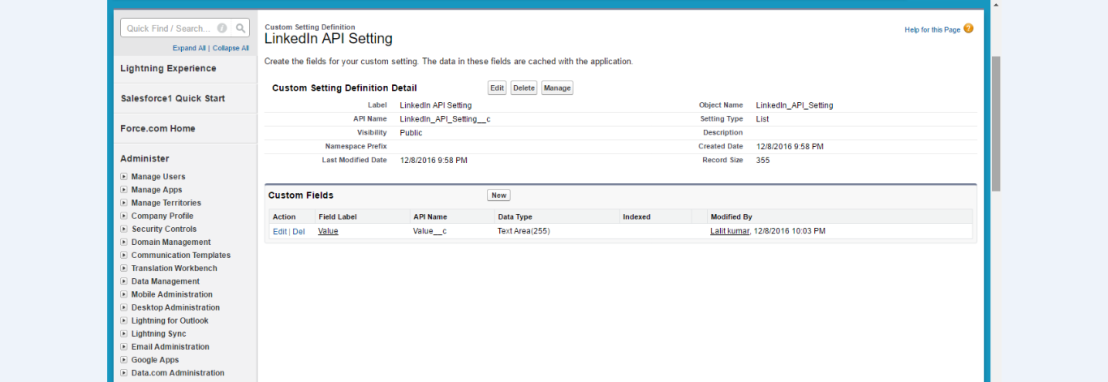
- Click Manage in Custom Setting Definition Detail page as shown in the previous screenshot and create two fields called LinkedIn Endpoint and LinkedIn API Key.
- In the “LinkedIn API Key” field, paste the client ID generated in step 1 (a)
- In the “LinkedIn Endpoint” field, paste the endpoint url shown earlier in step 3 viz. “https://api.linkedin.com/v1/people/~?format=json . This is done in order to avoid generating a response in XML format.

Step 7: Create Apex class
Now an Apex class is created in order to achieve the following
(i) Http request is sent to the Linked APIs to get the desired response in JSON format
(ii) To parse Json response using JSONparser class
(iii) Mapping of JSON response in terms of key value pairs to the custom fields created in the Salesforce org as created in step 4
Access Setup → Quick Find / Search → Develop → Apex Classes → New to create an Apex class namely LinkedProfileDetails.
and then paste the following apex code for the class in the space provided and save it.
global class fetchProfileDetails {
    webService static void  profDetail(String recordid) {
        String mykeyy = LinkedIn_API_Setting__c.getInstance( 'LinkedIn API Key' ).Value__c;
        system.debug(mykeyy);
        String endpt = LinkedIn_API_Setting__c.getInstance( 'LinkedIn Endpoint' ).Value__c;
        HttpRequest httpRequ  = new HttpRequest();
        Http http            = new Http();
        HttpResponse httpResp = new HttPResponse();
        httpRequ.setMethod( 'GET' );
        httpRequ.setEndpoint(endpt);

        String authorizationHeader = 'Bearer AQU2mtlr5PiTB7HbMG6Hi0UBWWrZeIZpMdudFv8JIqb0K9JVgcLVqyPjT_gdM0dDKfOKeTQQ7S3gAudv2zheBfaapYSbpmT_yoMFLTDjuWrSegleLaEdp415-4FrNCU59i-jyOXNPEqeXGim4h7TwZ_aDv-qPHeA';
        httpRequ.setHeader('Authorization', authorizationHeader);
        httpResp = http.send( httpRequ );
        System.debug(httpResp.getBody());
         JSONParser  fname1l = JSON.createParser( httpResp.getBody() );
         fname1l.nextToken();
         fname1l.nextToken();
         fname1l.nextToken();

         JSONParser  lName = JSON.createParser( httpRes.getBody() );
         lName.nextToken();
         lName.nextToken();
         lName.nextToken();
         lName.nextToken();
         lName.nextToken();
         lName.nextToken();
         lName.nextToken();
         lName.nextToken();
         lName.nextToken();

         JSONParser headline = JSON.createParser( httpRes.getBody() );
         headline.nextToken();
         headline.nextToken();
         headline.nextToken();
         headline.nextToken();
         headline.nextToken();

         JSONParser prolink = JSON.createParser( httpRes.getBody() );
         prolink.nextToken();
         prolink.nextToken();
         prolink.nextToken();
         prolink.nextToken();
         prolink.nextToken();
         prolink.nextToken();
         prolink.nextToken();
         prolink.nextToken();
         prolink.nextToken();
         prolink.nextToken();
         prolink.nextToken();
         prolink.nextToken();
         prolink.nextToken();

        string firName = fname1l.getText();
        string lasName = lName.getText();
        string headline = headline.getText();
        string prolink = prolink.getText();

        system.debug(fname);
        LinkedIn_Profile__c lp = new LinkedIn_Profile__c();

        lp.First_Name__c = firName;
        lp.Last_Name__c =lasName;
        lp.Headline__c = headline;
        lp.Profile_URL__c = prolink;

        lp.id = recordid;

        system.debug(lp.First_Name__c);

      update lp;
    }
}
Step 8: Create a Custom “Import Profile Details” button
In this step, an “Import Profile Details” button is created and Javascript code will be added to the button such that the LinkedIn apex class is executed on clicking this button. On execution of the Apex class, the information contained in the JSON response is available in the custom fields created earlier in Step 4.
(a) Create a Custom “Import Profile Details” button
Go to Setup → Quick Find / Search → Create → objects → LinkedIn Profile → Buttons, Links, and Actions. Then name the Label as “Import Profile Details”. And fill the details as shown in the snapshot below.
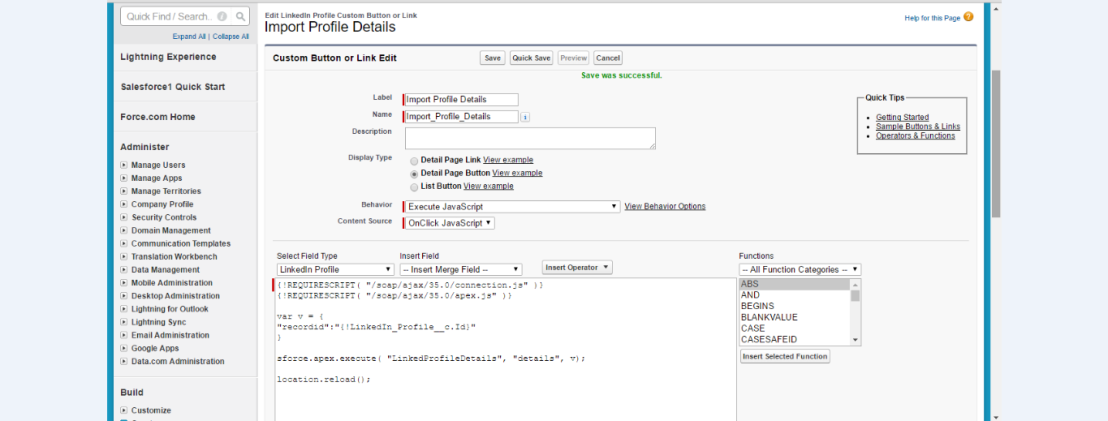
(b) Add Javascript code to the button
To add the javascript code to the button, paste the code as shown in the previous snapshot.
{!REQUIRESCRIPT( "/soap/ajax/35.0/connection.js" )}
{!REQUIRESCRIPT( "/soap/ajax/35.0/apex.js" )}

var v = {
"recordid":"{!LinkedIn_Profile__c.Id}"
}

sforce.apex.execute( "fetchProfileDetails", "profDetail", v); location.reload();
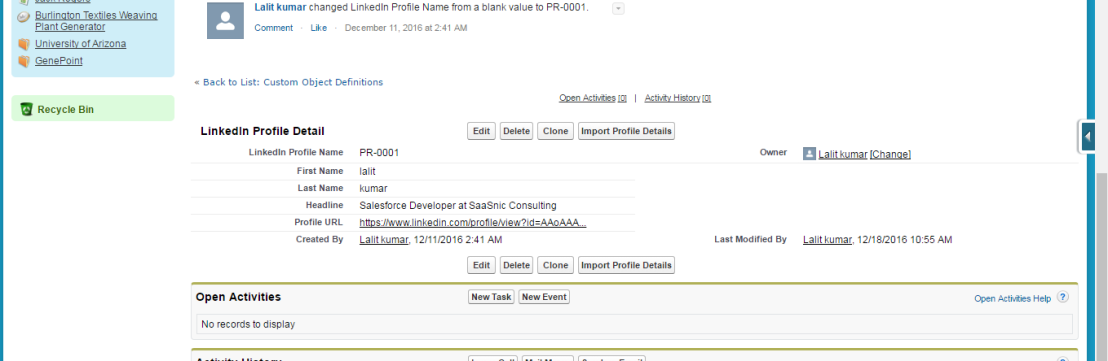
Step 9: Check the Output
Go to LinkedIn Profile Detail object. Create a record. Save it.
Click “Import Profile Details” button. You should receive the basic profile information mapped to the fields.
Future scope: There are endless use cases which can be built on this integration platform despite the fact that we have fetched very little information. For e.g., an automated interview call may be sent to someone as soon as the profile heading is changed to senior Salesforce developer from junior Salesforce developer.
